Elephant String Art String Art That Will Go With Green Rooms
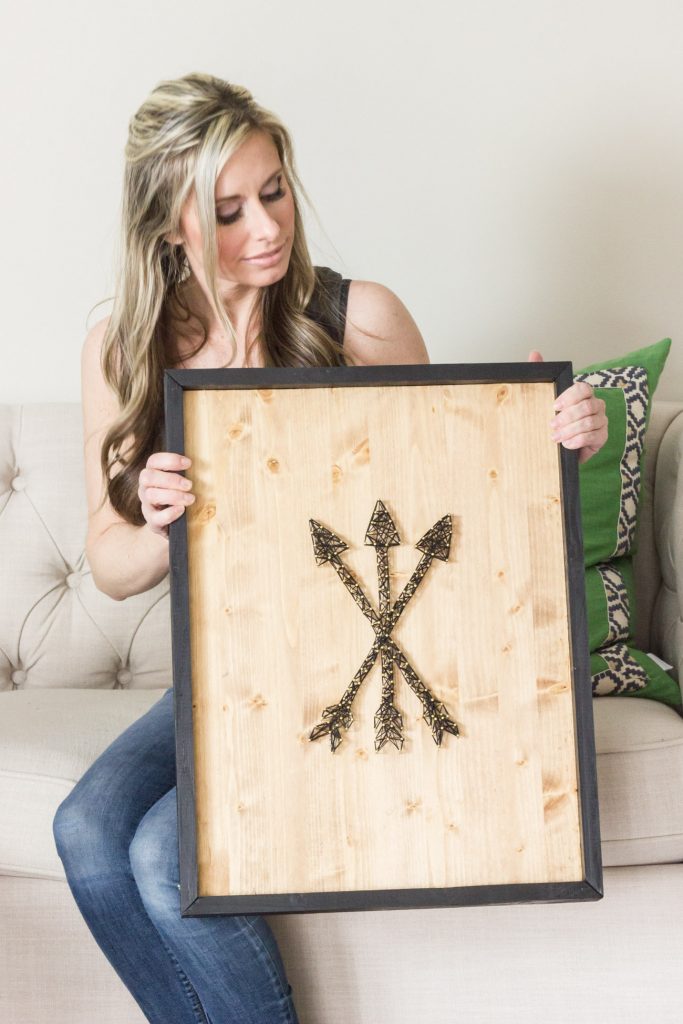
I honey string art. I love that it looks modern only there are endless ways to customize information technology, and it'south easier than it looks. Today I'll show you how to make cord art, specifically this DIY pointer art inspired by one of my tattoos! This project came about because someone recently asked me if I would make a YouTube video of this elephant string art that I made for Jonah's nursery. I didn't want to brand the exact same thing, merely I idea I could share my technique but make a new blueprint, and share it in blog post class as well every bit YouTube video class. There are several techniques you can use (if yous check out the elephant string art you'll come across I used a projector for that 1), but I'll share how I made this specific project. Then here yous go!

Projection Supplies:
(Includes affiliate links. As an Amazon Associate I earn from qualifying purchases.)
- Wooden Sheet (You can buy one pre-fabricated at the arts and crafts store, merely I used a portion of a project panel I had on paw. Yous could besides laminate your ain using 1x lumber.)
- Circular Saw (If you are cut your own woods as opposed to using a pre-made canvas)
- ane×2 Board (I beveled the ends at a 45 caste angle, not parallel. Cut into two pieces at 17″ long at longest points and 2 pieces cut to 21 1/4″ at longest points)
- Miter Saw
- Measuring Record
- Pencil
- Forest Filler (Optional)
- Wood Glue
- Brad Nailer
- Blackness Acrylic Arts and crafts Paint
- Pocket-sized Paintbrush
- Varathane Special Walnut Stain
- Cotton wool Rag
- 3/4″ Contumely Escutcheon Pins
- Hammer
- Blackness Embroidery Floss or Yarn
- Arrow Template (You can download a gratis printable version of the one I designed here.)
HOW TO MAKE String ART
Footstep 1: Cutting YOUR Wood
First, I cut my project panel to my desired size. I opted to cut it to 15.v″ Ten 21″ (I but eyeballed it and chose a size that looked right to me), but you can use any size wooden canvas you'd similar.
![]()
![]()
Next, I cut my 1×2 pieces which I will be using for the frame. I beveled the ends at 45 degrees (not parallel) so that I could have a frame with mitered corners. I cutting 2 pieces at 17″ long (at the longest points) and 2 at 21 i/4″ long (at longest points).
![]()
Step 2: PATCH & SAND
I sanded everything smooth, especially the rough edges.
Next, I used a trivial bit of wood filler to patch where I had some tear out on my 1×2 pieces. I'll be painting over it later so I just want it to look polish.
![]()
Afterward the wood filler had dried, I sanded it smoothen with a sanding sponge.
STEP 3: PAINT AND STAIN
Side by side, I painted the frame pieces with blackness acrylic craft paint.
![]()
I stained the wooden canvas with Varathane Special Walnut Stain.
![]()
STEP four: ASSEMBLE FRAME
After the paint and stain had dried, I attached the frame pieces to the wooden canvas using wood gum and my brad nailer.
![]()
Stride v: TRACE TEMPLATE
Now information technology was time to create the string art. I printed this arrow template (you tin can download a printable version here), and placed it in the center of my wood.

This design was actually inspired by one of my tattoos! A packet of arrows is a symbol of forcefulness, and to me they as well symbolize each of my iii boys.
![]()
Side by side, I measured only to make sure my template was centered.
![]()
I traced the outline of the arrows with my pencil, pressing hard enough that information technology would make a slight indentation in the wood underneath it.
![]()
![]()
STEP half dozen: HAMMER NAILS
Using the pencil indentation equally my guide, I hammered my contumely eschutcheon pins effectually the perimeter of the pointer shapes, spacing them as equally as I could (near ane/4″ – 1/2″ apart).
![]()
STEP 7: CREATE String Fine art
First, I tied my black embroidery floss to 1 of the brass pins (information technology doesn't matter which one).
![]()
Then I only started randomly stringing information technology back and forth, being careful to avoid where I wanted to keep negative space. I did this until it looked as dense as I wanted it, and I made sure to cord information technology around the perimeter of the arrows too to create a more than defined outline. And then, I tied the end around one of the pins and snipped the excess off.
![]()
You can use velcro moving-picture show hanging strips for this or y'all can attach picture hanging hardware on the back.


Cheque out the video tutorial on my YouTube aqueduct here:
You Might Also Like:
- DIY Elephant String Art
- IKEA TARVA Dresser Hack
- Projection Gallery


Cheers for visiting!
-Erin
Source: https://www.erinspain.com/how-to-make-string-art-diy-arrow/
0 Response to "Elephant String Art String Art That Will Go With Green Rooms"
Post a Comment